Hatcher Guitars Blog
Latest news, media, product anouncements and in-depth information.
Check in regularly!

Latest news, media, product anouncements and in-depth information.
Check in regularly!
Every July Premium Guitars magazine runs an Acoustic Gear Showcase on their online edition. I took a full page to introduce my Woodsman guitar. To see the ad (click here)
We shot a video featuring Charlie Chronopoulos who has been doing my sound sample clips for years. This was the guitar Charlie decided to buy.
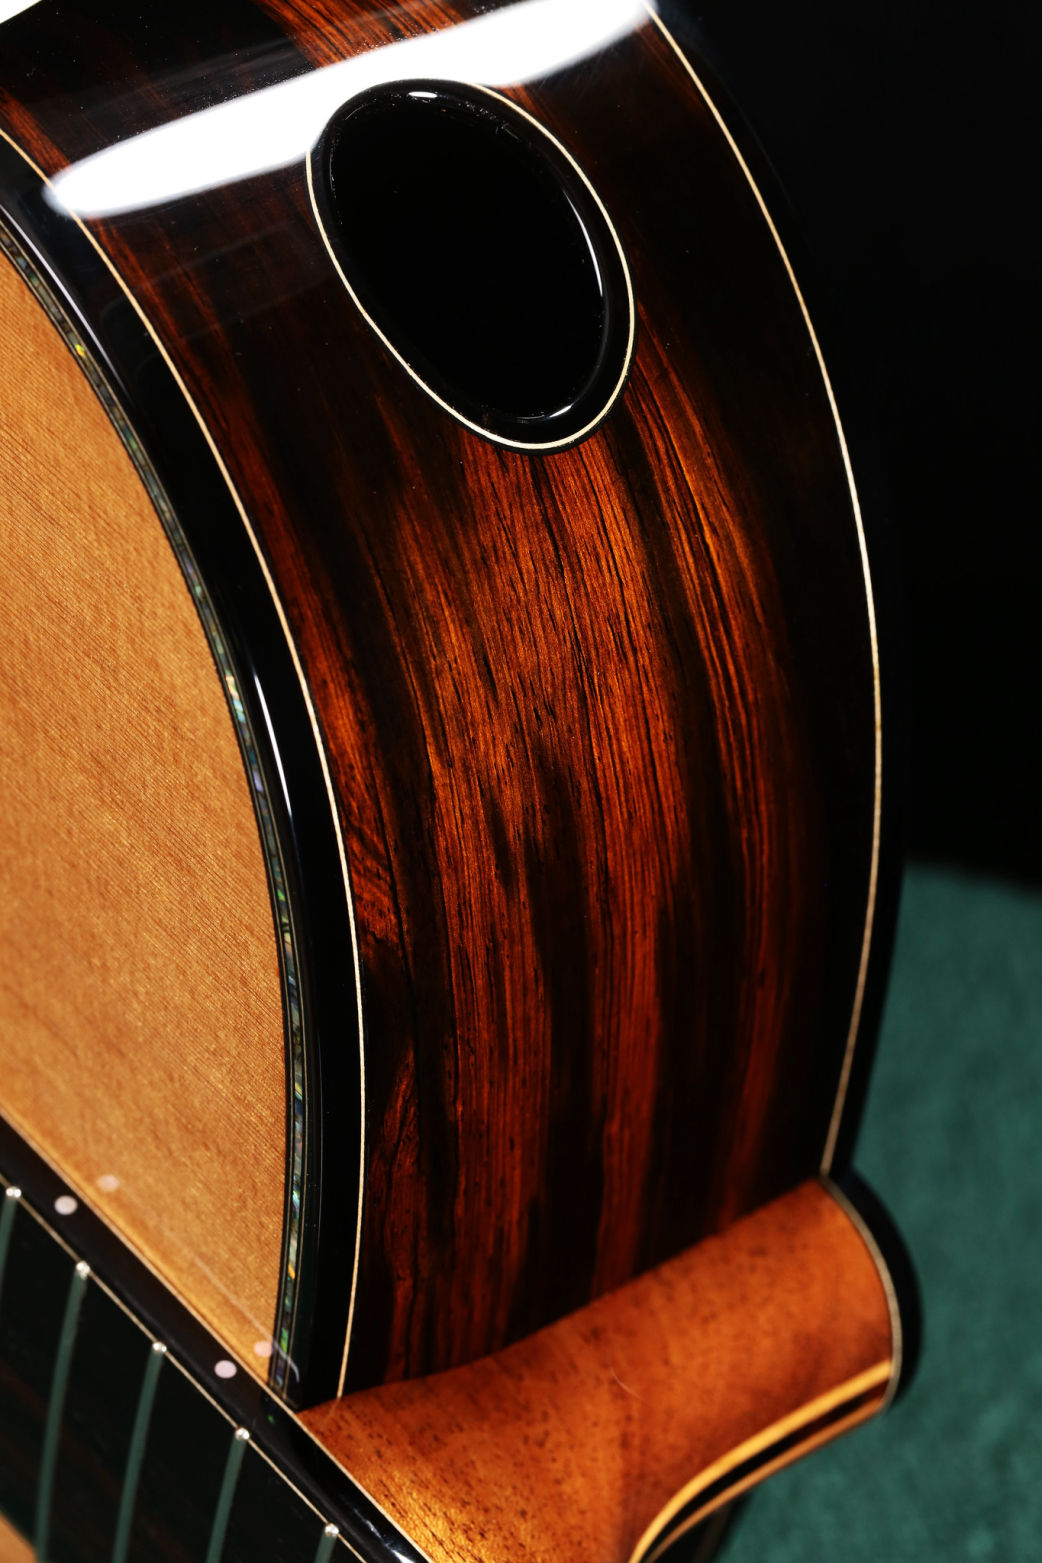
Side ports are still a relatively new option for guitars. Their purpose is to bring some clarity and better tonal balance back to the player. The higher frequencies from a guitar tend to project straight out away from the artist. Sound ports point some treble back at the player. It is not so much an increase in volume as it is an improvement in detail and clarity.
The effect is dependent on the room you play in. Normally, what highs you hear are those that are reflected back at you from the room. If you tend to play in a little room in front of a blank wall you probably won't notice a sound port that much.
A sound port are most effective in larger rooms or rooms with a lot of sound deadening things like upolstery, carpet, etc. They also shine when you are trying to hear yourself while playing with others.
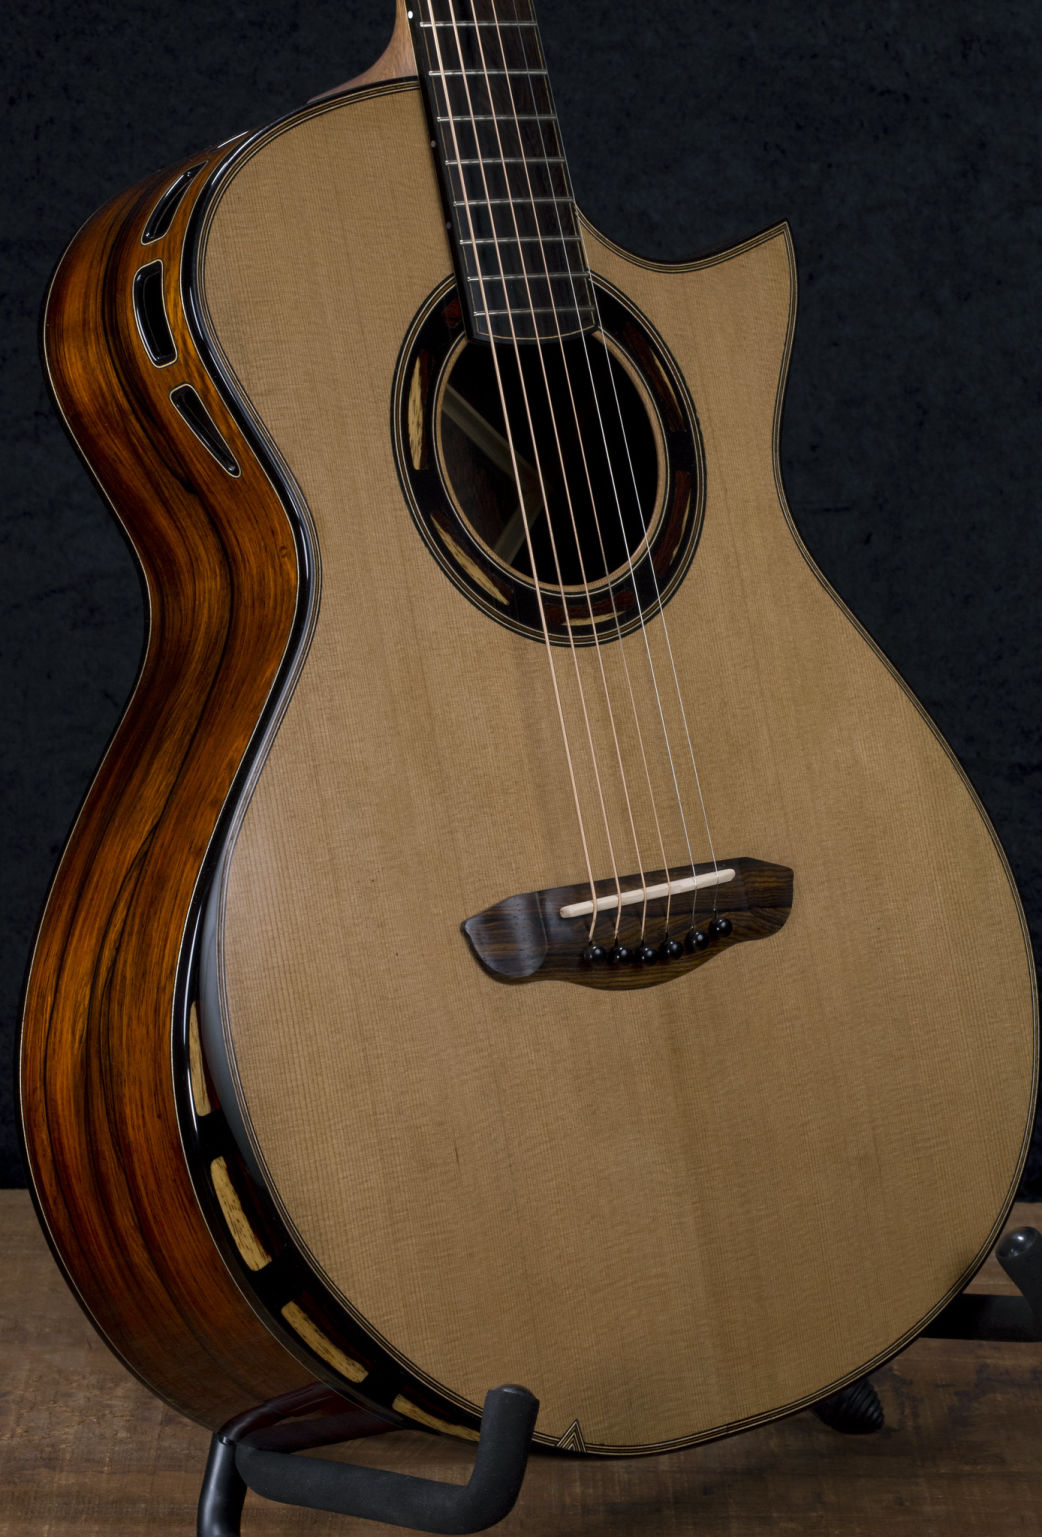
One comment I frequently get from clients new to sound ports is they no longer get neck and/or back pain when playing. The reason for that is simple, when you can't hear the guitar clearly the tendency is to lean forward over the front of the guitar to hear better. With a sound port you can sit more comfortably and hear yourself whether you are alone or performing with others.
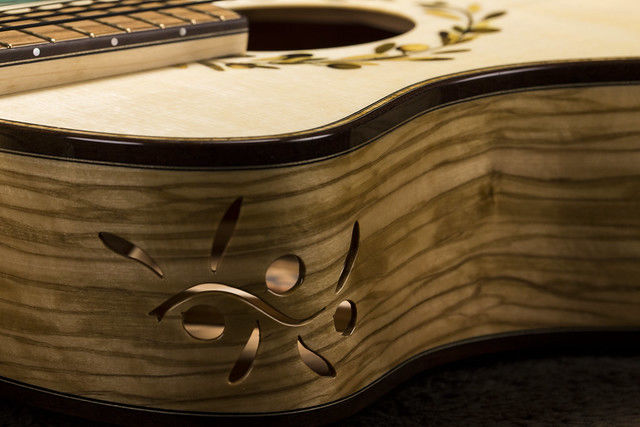
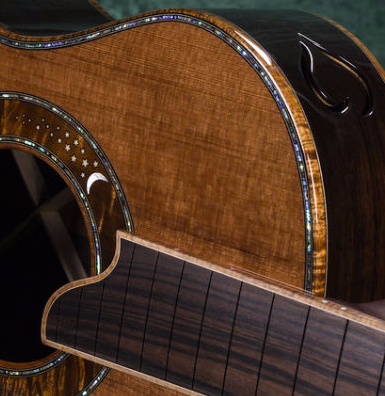
The sound port presents additional opportunities to enhance the ascetic of your instrument. We can repeat shapes to add a more cohesive over all look like this guitar on the right. We can also use the design to build on a theme, as below.
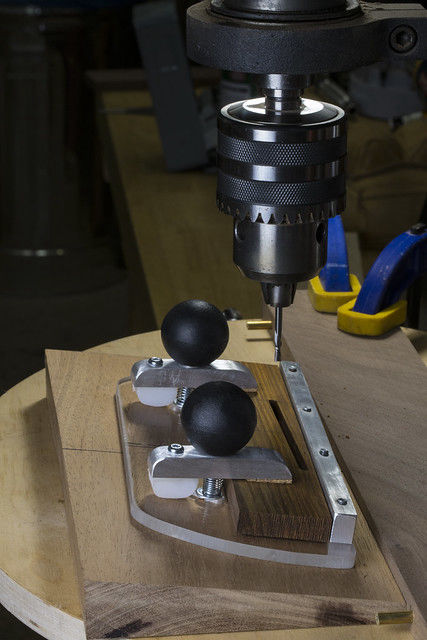
This month I upgraded the way my saddles are mounted. The slot is now cut at a slight back angle which accomplishes several things;
First: It helps to keep the guitar intonated when string height is changed by raising or lowering the saddle. The higher the strings are the more sharp they go when they are stretched to the fret. The way this is accommated is to make the string a little longer. With the saddle tilted back at the right angle, the higher the saddle, the longer the string and it goes shorter when the strings are lowered in this way.
Secondly: One of the stress points on a bridge is the saddle being pushed forward by the strings going over the top. This stress can push the saddle forward with time and throw the strings out of intonation. Worse yet the forward stress can sometimes actually crack or break out the front of a bridge.
Tilting the saddle back directs the force down into the bridge more and relieves some of that stress and just might save a repair one day.
Third: I've heard it said that having the string force focused down more is helpful to the overall tone and response of the guitar. I frankly don't have a way to test that so let's just say it may help and just put it into the best practices bucket. I certainly can't see a way it could hurt.
I've also heard it improves the performance of piezo under saddle pickups. It's likely to actually help there as the saddle would more freely be able to push down on the piezo ribbon.
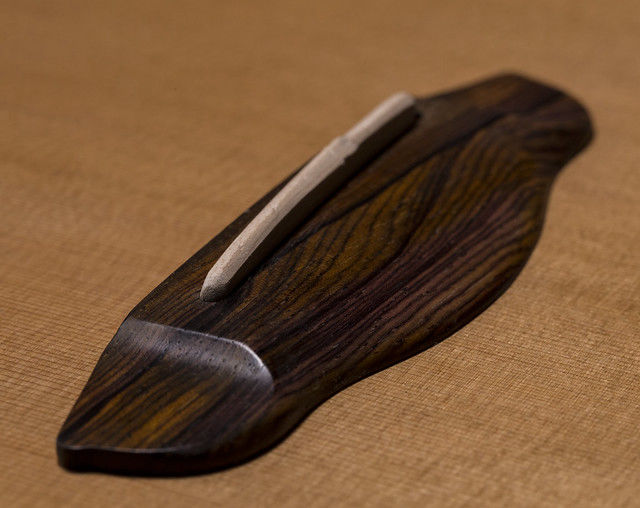
This is the kind of improvement I am always looking for. I did need to spend some time to make a tricky little adjustable jig but, that was a one-time thing. Going forward this is another one of the many standard features I offer on my guitars.

I offer a French polish method that is a lot more like they did in the 1800s. Back then they weren't trying to make a finish look like today's thicker perfect gloss finishes. The goal was to make a strong beautiful finish that protected the wood and showed it beautifully.
A sealer is used to start the process. This keeps the finish from soaking in too much and darkening the end grain and it prepares a surface the shellac will adhere well to. The traditional method was to use egg.
There are a number of parts to an egg. What we're probably most familiar with would be the yoke, which contains a lot of fat and protein, and the protective albumin layers around the yoke which we know as the egg white. The albumin has a thick layer and a thin layer which are both mostly protein and water. The thick layer has some other stuff but, we don't care because it's the thin layer we're after. Above is a picture of an egg in a familiar setting so you can see the yoke, the thick albumin layer, and then the more watery thin albumin layer which I'll be using as the sealer.
I think the best finish for a vintage style instrument is French Polish. It is the traditional finish for guitars because it is hard, nontoxic, and can be applied very thin. This reduces weight and allows for a very responsive guitar. It doesn't blush or break down from UV exposure. It has a reputation for not wearing well and becoming sticky under various conditions. In my view this reputation for poor wear and stickiness comes from attempts to make French Polish look like a contemporary synthetic finish. If we're going with a more traditional look we don't need to be burdened with compromises made to look synthetic.
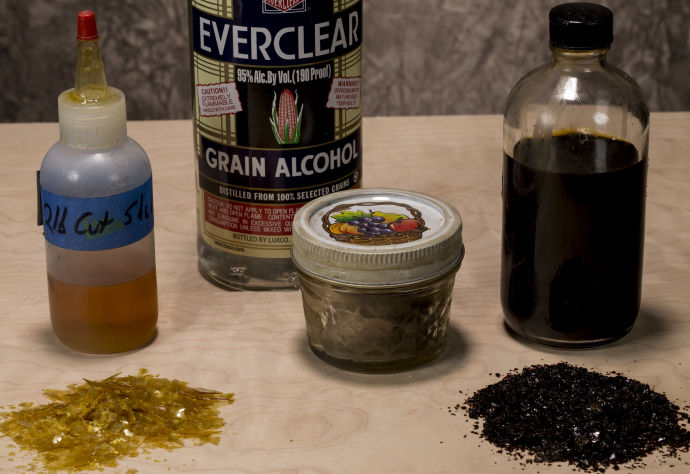
This picture shows the flakes of shellac that are dissolved in alcohol. On the left is what we commonly see today which is a heavily processed flake that has been bleached to a "very light blond" so that it looks more contemporary. Problem is this weakens the finish and makes it softer and more likely to go sticky under a sweaty hand. I'm using unbleached shellac flake that you see on the right which was commonly in the 1800's. As I said earlier the finish is going on thin so that dark look will be minimized and any darker cast it might add will look great on an traditional style instrument.
I use grain alcohol because it works great and is far less toxic than denatured alcohol. This is what the shellac is dissolved in for application. The little jar is where I keep the cotton and wool applicator I use for application.

I was very excitied to get in a large supply of sound boards made from the tunnel support beams of the Shasta Route of the Southern Pacific Railway. These tunnels were made in 1800's. The beams were cut from the original old growth forest. When these beams were replaced they were cast down into the ravine below.
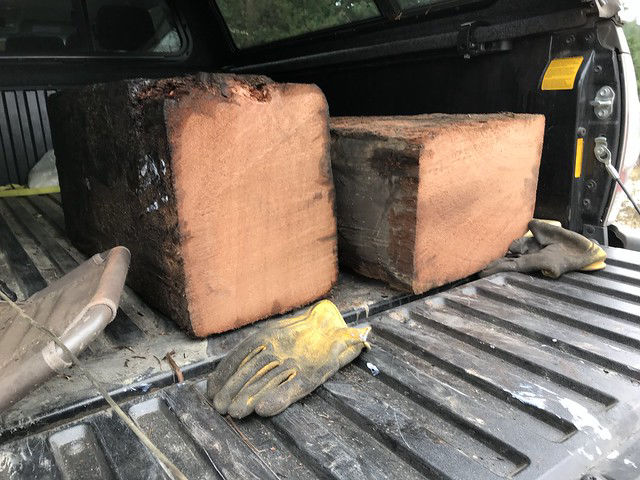
My intrepid source selected the best cuts and hiked them out of the ravine to re-saw and proccess into some of the best soundboards available today. These were milled and have been seasoning since before the Civil War. This well seasoned wood is stable and rings like a bell with great sustain. The tops are also beautiful. There are some character cuts that show their age and there are also very clean set.
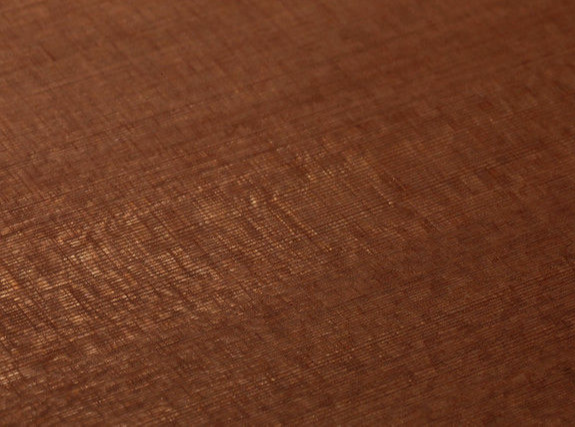

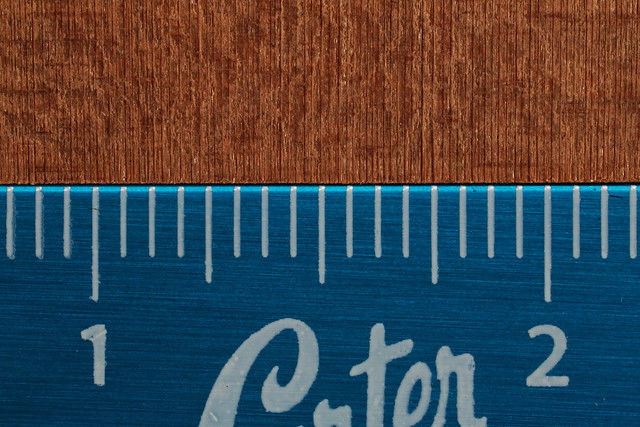
Look at how many grain lines per inch this has! I count an average of 72. Yet this wood is relatively lightweight usually falling between Sitka Spruce and Western Red Cedar.
You can see above how well quartered it is.
I estimated how many of these tops I thought I could possibly build in my lifetime and am now in very good supply.
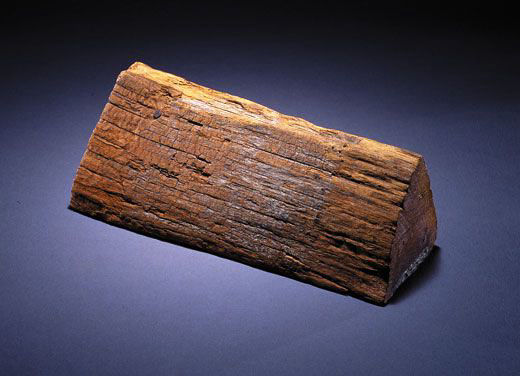
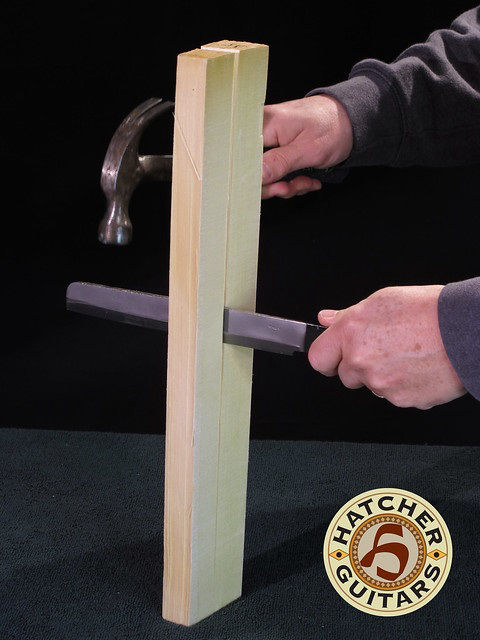
Back before sawmills boards were hand split from logs. Sawmills are faster but rived wood is stronger, stiffer and much more stable.
You see, it has always been that with every advance in technology something important usually gets left behind. That's why it's important to know and understand the
old ways.
This picture is of the most famous piece of riven wood. It's in the Smithsonian Museum. Abraham Lincoln split this making fence rails and much later used it as a campaign prop. It symbolized his commitment to the values of hardwork and doing things the right way.
That is why I take the extra time to split out my tone braces for my guitar tops. A properly split brace can be 30% stiffer than another brace sawn from the same board! This means I can make braces lighter and they will be less likely to crack in the future.
"Well I saw my braces because it's so much faster and there is a lot less waste".
I say you should ask yourself, do you really want such critical parts, that affect the sound and longevity of your guitar, to be made out of waste wood?
Premier Guitars Magazine did profiles on various builders by region. I was interviewed for the North East Region.
You can find the full article online (here)
or click the picture.